LinkedIn is a crucial social platform for B2B companies. It's important to establish a presence and regularly share high-quality posts. Managing a company profile, often across multiple platforms, is a significant task for social media or content marketers. To efficiently and effectively handle this responsibility, leveraging the features provided by tools integrated into the HubSpot CRM can be valuable.
In this blog post, I will demonstrate step by step how to publish a post on LinkedIn using HubSpot's social media tools and how to make the most of the functionality it offers.
Creating a LinkedIn post
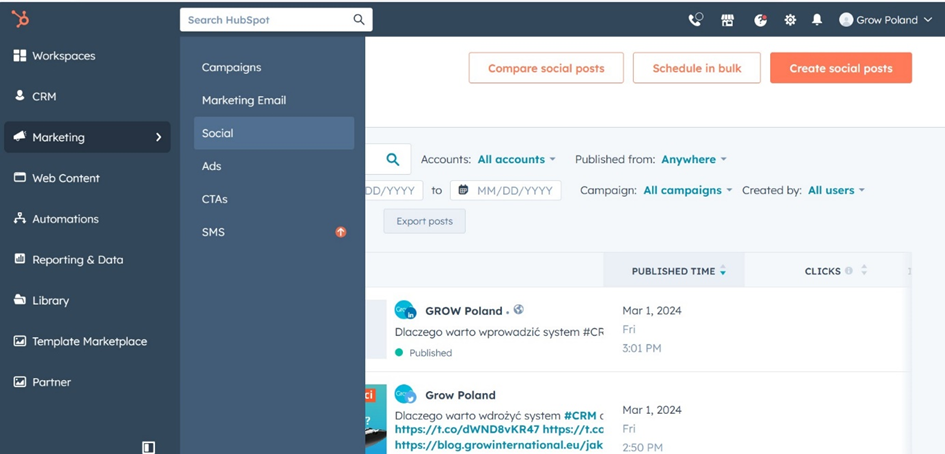
To start creating a post on LinkedIn, go to the "Marketing" tab, and then select "Social." Social media publishing features are available in HubSpot Marketing Hub from the Professional level onwards.
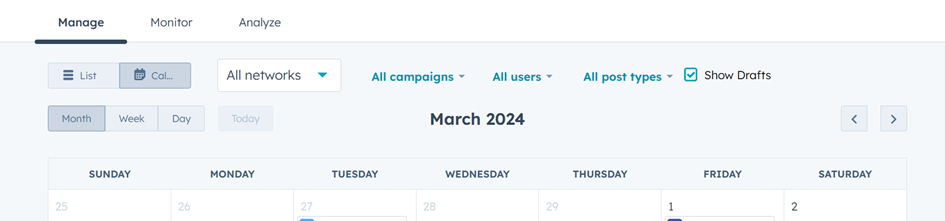
You will be redirected to the dashboard enabling social media post creation within HubSpot. You have three tabs to choose from: "Manage," "Monitor," and "Analyze." The post creation is facilitated by the first one, "Manage."
The other two tabs contain tools for tracking all mentions and interactions with your company (in the "Monitor" tab) and monitoring the results of social activity (in the "Analyze" tab). However, in this post, we will focus on publishing a post.
Select: "Create social posts." By clicking, you will enter the post creation wizard. On the left side, you will see the post creation tools, and on the right, a preview of the finished post. This allows you to immediately see how your post will look and take care of details such as the appropriate "light" between text segments, ensuring readability.
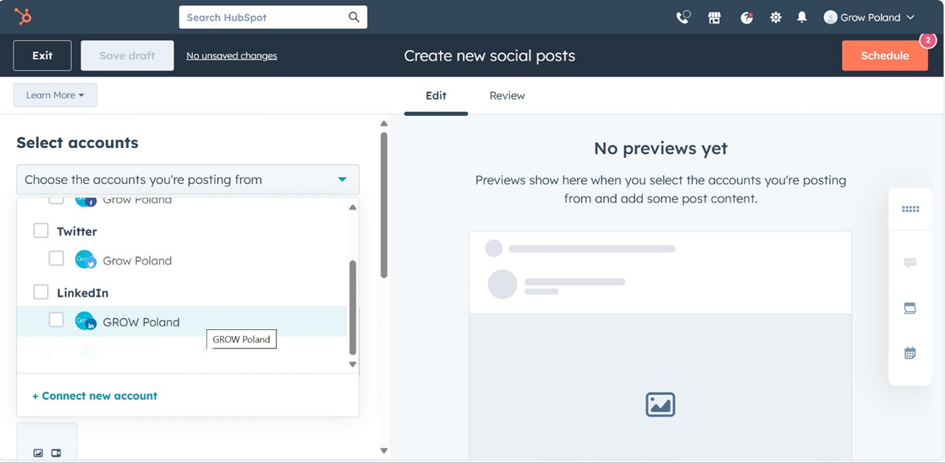
First, we choose from which account we want to publish the post. In HubSpot, we can connect both the company's account and employee accounts, such as sales representatives.
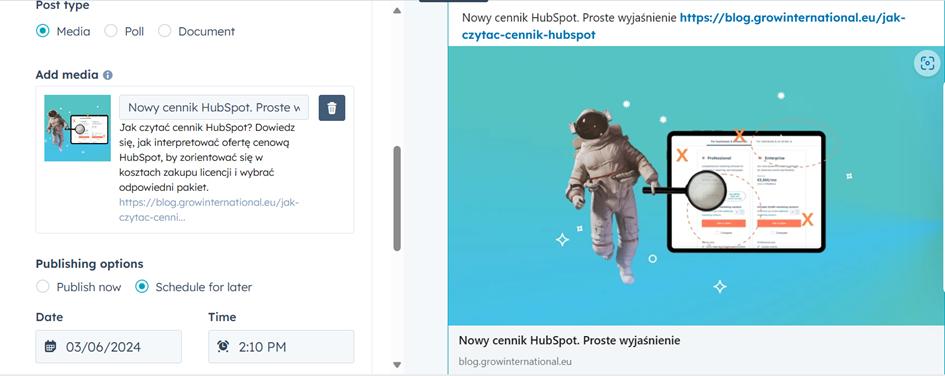
Once you select the account, you will gain access to the tab allowing you to create text and attach multimedia for a specific social network.
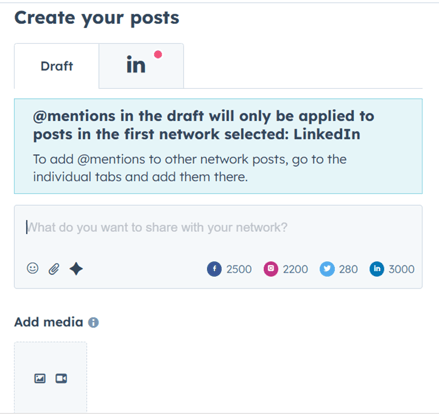
You can also use the "Draft" tab – if you're publishing from more than one account (e.g., LinkedIn, Facebook, Instagram, Twitter), the texts and settings chosen in this tab will automatically appear in all of them. Then, you can customize the content for each channel. This is a very convenient option if you want to set the same publishing time for multiple channels or include the same image in them. In such a case, you only need to set up all the settings once.
This time, we are publishing only on LinkedIn. In the bottom right corner of the editor, you will see the maximum number of characters remaining for your use.
Pay attention to the three small icons below the editing window. In HubSpot, you can directly search and add emojis and insert links to your website and landing pages. HubSpot will automatically pull the relevant description and image associated with the shared page, which you can preview on the right side.
The last icon ("star") gives you the opportunity to use HubSpot's built-in AI tools. Don't have an idea for the text? Provide a topic, and the AI assistant will suggest a post that you can modify according to your needs.
If you want to learn more about creating content on LinkedIn, leveraging the knowledge of the platform's algorithm, check out my post on changes in the LinkedIn algorithm.
Adding resources
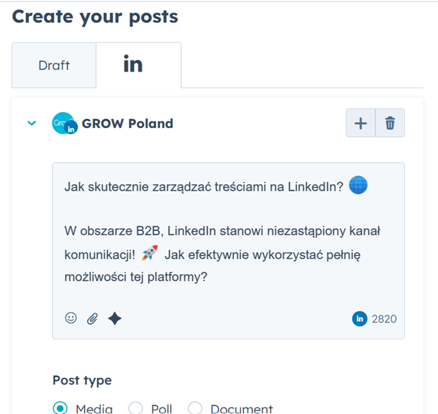
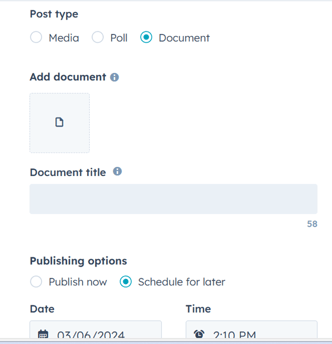
If you're not sharing any of your pages, it's time to add the appropriate multimedia to the text. For LinkedIn posts, HubSpot recently introduced new features that allow publishing not only images and videos but also PDF documents and surveys directly from the platform. This significant improvement enables convenient utilization of various formats without the need to add them directly on LinkedIn.
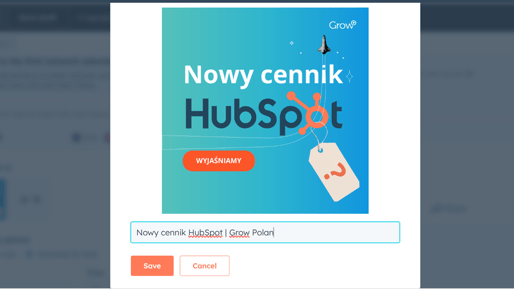
You can easily edit the added media. Make sure to include document titles and alternative text for images. In HubSpot, you can do this effortlessly for all platforms by hovering over the "T" icon on the thumbnail of your image.
Publishing a post
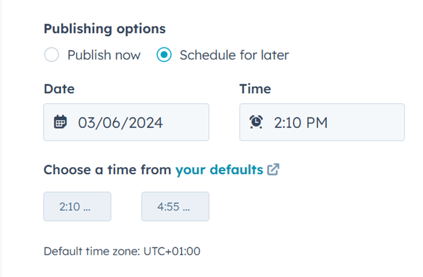
The post is ready. Now you can choose whether you want to publish it immediately or schedule it for later.
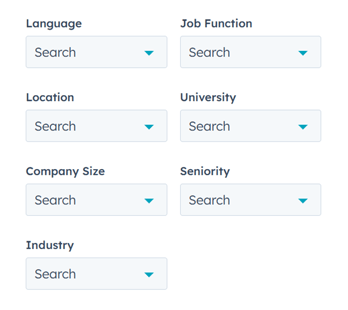
Below the publication date options, you can also decide who your post is targeted towards using 7 criteria. This ensures that your publication reaches the right target audience.
Finally, you can specify the marketing campaign to which you want to assign the post (if you want your post to be part of a campaign you are running in HubSpot).
When all the necessary parameters are set, you can add the publication to the schedule by clicking "Schedule" or save it as a draft, for example, for review by other team members by clicking "Save draft."
You will see the scheduled posts after completing the editing in the calendar. To view it, select "Calendar" on the publication management dashboard.
What are the benefits of publishing posts through HubSpot?
As you can see, the entire editor is user-friendly. It also comes with a full set of features that allow you to publish materials and set publication parameters through HubSpot, in the same place where you manage publications on other platforms. This facilitates easy collaboration among multiple individuals, such as a copywriter, designer, and marketer, working on a single publication. It also gathers analytical data regarding your social networks – all in one place. And when a post is scheduled in advance, you don't have to worry about being online at the time of publication.
Do you want to connect your social media accounts with HubSpot? Do you need more tips on publishing on social media with Marketing Hub? Or perhaps you're looking for someone who can prepare posts and multimedia ready for publication? Be sure to let us know!